Holiday Treats:)

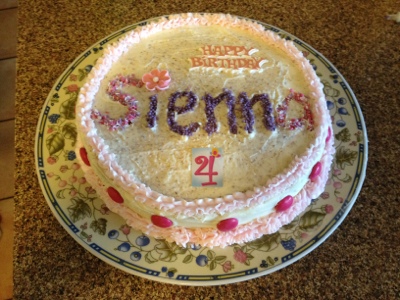
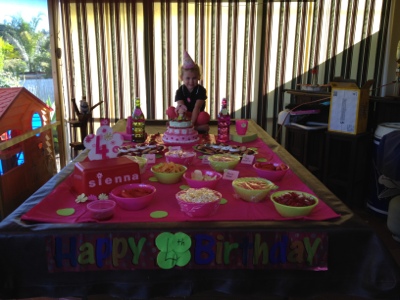
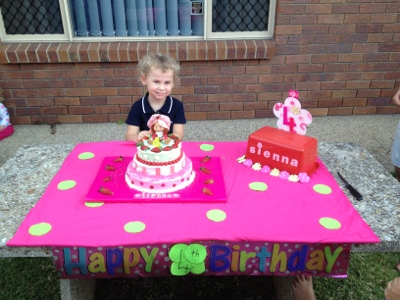
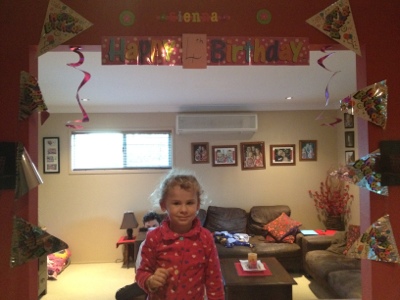
These school holidays have been very cold and for the first week very wet! So what better time to bake with the kids:) At first I set myself a goal to bake or cook something different with the kids each day, but of course life got in the way a bit! But then it was Sienna’s birthday on the middle weekend, so with all the treats I baked for her special day, it made up for any lost days!

The following recipes are the ones I’ve used to bake the following treats:

Vanilla Rainbow Cake:
Ingredients:
Melted butter, to grease
450g (3 cups) self-raising flour
150g (1 cup) plain flour
440g (2 cups) caster sugar
300g butter, cubed, at room temperature
310ml (1 1/4 cups) milk
6 eggs, at room temperature
3 tsp vanilla essence
Method:
Preheat oven to 140°C. Position a rack on the second lowest shelf of the oven. Brush a round 25cm (base measurement) cake pan with the melted butter to lightly grease. Line base and sides with non-stick baking paper.

Place the self-raising flour, plain flour, sugar, butter, milk, eggs and vanilla essence in a large mixing bowl. Use an electric beater to beat on low speed for 30 seconds or until just combined. Increase the speed to high and beat for 1-2 minutes or until the mixture is thick and all the butter is incorporated. Spoon the mixture into the prepared pan and smooth the surface with the back of a spoon.

Bake in preheated oven for 2 1/2 hours or until a skewer inserted into the centre of the cake comes out clean. Remove from oven and set aside for 10 minutes. Turn onto a wire rack for 2 hours or until completely cool.

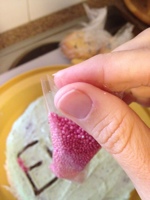
To make a rainbow cake you divide your cake mixture into separate bowls and add your desired colours. Then simply pour each bowl of cake mixture into the middle of your cake tin and watch the colours combine!

20120706-072008.jpg

20120706-072017.jpg

20120706-071915.jpg
This was the best tasting cake I’ve ever baked:)
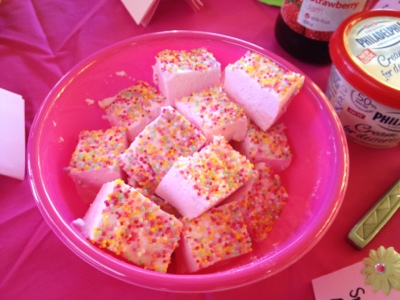
Marshmallow:
Ingredients:
3 cups sugar
2 tablespoons gelatine
1½ cups boiling water
Essence and colouring

Method:
Put sugar in a large bowl. Dissolve the gelatine in the boiling water and then add to the sugar.
Beat until thick and white and the sugar is dissolved completely.
Add a little almond essence and colouring if desired. I added some vanilla essence instead of almond.
When colour is even, pour into a wet tray and let stand for a few hours before cutting into squares and rolling in coconut or icing sugar.

20120706-071855.jpg
This was so easy to make! I researched a lot of different recipes on making marshmallow and this one included the least amount of ingredients and involved the shortest preparation time and turned out fantastic! I can’t wait to try it again and put the marshmallow in little ice-cream cones:)

Biscuits:
Basic butter biscuit dough:
Ingredients:
125g butter, softened
1/2 cup caster sugar
1/2 teaspoon vanilla extract
1 egg, at room temperature
2 cups plain flour
1 teaspoon baking powder
1 tablespoon milk

Method:
Preheat oven to 180°C. Line 2 baking trays with baking paper.
Using an electric mixer, beat butter, sugar and vanilla in a small bowl until pale and creamy. Add egg and mix until well combined. Sift flour and baking powder over butter mixture. Add milk and stir until just combined.

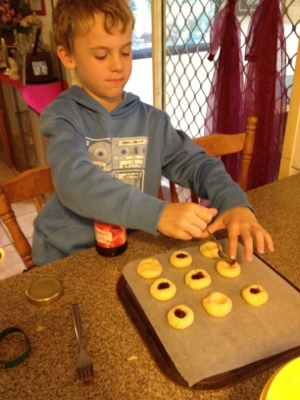
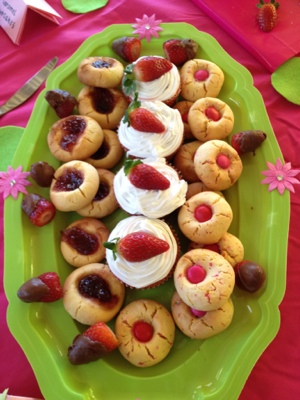
Once the mixture is made, you simply add what you wish to it! I’ve made 4 different types over the holidays….jam drops (I rolled a bit of the dough into a ball and then pushed my thumb into the middle of the ball and filled that with jam)! One batch I added cornflakes, another choc chips and another hundreds and thousands with a smartie in the middle!

20120706-072048.jpg

20120706-071941.jpg

20120706-071716.jpg

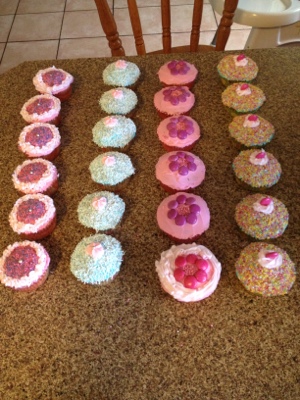
Pink Vanilla Cupcakes:
Ingredients:
125g butter
155g (3/4 cup) caster sugar
2 eggs
225g (1 1/2 cups) self-raising flour
125ml (1/2 cup) milk
Pink food colouring

Method:
Preheat oven to 180°C. Place desired cupcake papers into muffin tins.
Use an electric beater to beat together the butter and sugar in a large bowl until pale and creamy. Add the eggs, 1 at a time, beating well after each addition, until combined. Stir in the flour, milk and pink food colouring until just combined.
Spoon the mixture evenly among the prepared pans. Bake in preheated oven for 15 minutes or until a skewer inserted into the centres comes out clean. Remove from oven. Turn onto a wire rack and set aside for 30 minutes to cool.
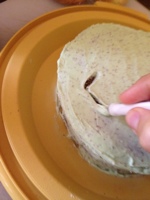
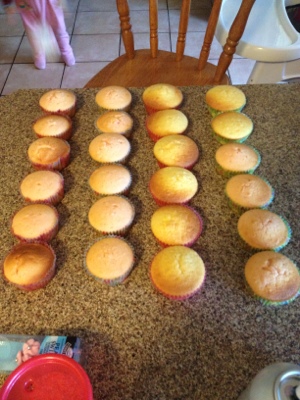
I always decorate my cupcakes the next day:)

20120706-071830.jpg
I pour my mixture into the cupcake papers using a jug with a spout….so quick, easy and tidy!
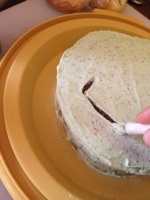
20120706-071809.jpg
Before!

20120706-071759.jpg
After!

20120706-071728.jpg
I made a double batch to make 24 cupcakes and with the left over mixture I made mini cupcakes which kids always love:)

Pikelets:
Ingredients:
2 cups self-raising flour
¼ teaspoon salt (optional)
1/3 cup caster sugar
1 egg
1 cup (250mL) milk
1 tablespoon butter

Method:
Sift flour and salt, add sugar, drop unbeaten egg into the middle of the bowl and stir.
Slowly add enough milk to make a thick batter. Beat well until smooth.
Heat a non-stick pan over a medium heat, melt ½ teaspoon butter and drop heaped tablespoonfuls of mixture into the pan.

20120706-071929.jpg
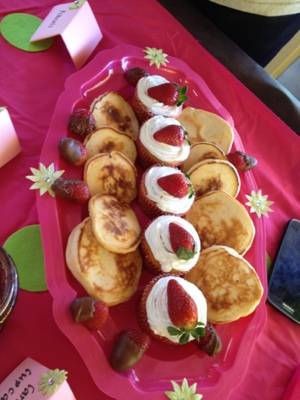
And of course pikelets always taste fantastic with jam and cream!

It has been a great couple of weeks experimenting with baking and decorating and most importantly the kids have had a ball! I haven’t done half the things I had planned on doing, but there is always next week and the next and the next!

Etch it out!

20120704-145329.jpg

Bailey’s wrestling ring cake with the wrestling logo etched out andu filled with sprinkles!

After spending the past two weeks doing a lot of baking and decorating, I’ve decided that spending time in my kitchen cooking or baking is quite therapeutic….except for the dishes!

Cake etching…what is it? Just a little technique I’ve been using quite a bit lately! Back in february when I made my son’s football birthday cake, I needed something to create the stitching part of the footy! I could have used my decorating icing cans or even lollies, but to be completely honest I’d run out of anything alike, but had plenty of sprinkles! An idea came to me to etch out the lacing part of the footy and fill it in with white sprinkles….and this is how it turned out:

20120704-141055.jpg

When I did Bailey’s wrestling ring I thought for sure we’d have the wrestling logo somewhere around here to put on the cake, but of course not! So I copied the logo and etched it out on the cake and filled it with sprinkles! I was quite happy with how that turned out!

Etching is great to use when you want to put a person’s name on their cake to! I’ve recently done two cakes and this is how they turned out:

20120704-141617.jpg
My daughter’s cake she took to preschool:)

20120704-141709.jpg
My sister-in-law’s cake for tonight:)

So how do you etch? Simple:) you need to find something that is pen like in size, I use a medicine syringe and then etch out of the icing what you want…

20120704-142025.jpg

20120704-142054.jpg

20120704-142136.jpg

Once you’ve finished etching out what you want, you can then continue to fill the space. I’ve only used sprinkles so far, but other things like piped icing or lollies could be used…I’ve got so many ideas I can’t wait to try! When using sprinkles you have to do it very slowly and carefully. I keep the sprinkles in the bag they come in and cut a tiny hole for them to come out of.

20120704-142414.jpg

So there you have it ‘the etching technique’…well that’s what I call it anyway:) happy etching everyone!!!

Just to let you know I’ve started a fan page for my blog on facebook…Click ‘like’ on My Party of 5 and keep up to date with everything relating to my blog! Thank you to everyone who is always so supportive of my blog:)

Sweets FoR mY Sweet!

Birthdays are such a great excuse to experiment with baking and decorating! My darling little girl Sienna turned 4 yesterday and because she is such a sweet little girl that never wants for much, I decided to create something special….her very own sweets table!

20120701-135656.jpg

Sienna is the kind of child who you can take to the shops and she never asks for anything more than a $2 packet of chewy! She has always been like that. Right up until two days before her birthday she still hadn’t really asked for anything for her birthday, she was just so excited that she was turning 4! A few weeks ago, she finally decided she wanted a strawberry shortcake birthday cake, so with some google searches and some tweaking of my own I created her the magical strawberry shortcake birthday cake of her dreams!

20120701-135908.jpg
This is my biggest master piece yet! I love the fact that the strawberry shortcake sitting on top of the cake was mine when I was little….she is almost 30 years old:)

I don’t do big birthday parties every year for our children, we have selected years for that, but we always celebrate a birthday in one way or another. All Sienna wanted to do on her birthday this year, was have a swim at the Runcorn Pool, have a BBQ and jump on her jumping castle! That she did. But I still felt bad because this was the year for her brother and sister to have birthday parties!

20120701-135727.jpg

One way to Sienna’s heart is food and sweet food at that! Sweets/dessert tables are so much fun and I thank my friend Michelle Shaw for her inspiration of them! Because of the strawberry shortcake theme cake, I based my table theme, colours and food around that! The colours I choose were hot pink and green with flowers for a touch of decoration and the food was either strawberry related or pink in colour.

This is how it all turned out:
The food:)

20120701-135756.jpg
Home made marshmallow….so easy to make!

20120701-135815.jpg
Star shaped fairy bread….for my little shining star!

20120701-135834.jpg
Caramel cupcakes finished with vanilla icing and a strawberry and pikelets with jam and cream!

20120701-135825.jpg
Jam drop biscuits, smartie cookies and strawberries dipped in chocolate!
Other foods on her table included her favourite things: popcorn, Cheerios, watermelon, chips and dip!

The decorating:

20120701-135855.jpg
I decorated a toy storage container to display her name and made a sign to say she was 4:)

20120701-135847.jpg
Everything I used from bowls to cups to the glass water bottles were in the theme colours of hot pink and green! I even decorated a special cup for Sienna to use:)

20120701-135901.jpg
I created little name tags for the food. As a table cloth, I used a hot pink piece of material I had in the cupboard and cut out green felt circles and scattered than out first before I put everything out!

20120701-135922.jpg
The day was a huge success and my reward was seeing how much joy was expressed on my sweet little girl’s face all day long!

20120701-144319.jpg
Happy 4th birthday my Sie Sie girl…you are the light that shines in our party of 5!

Stay tuned in the coming days when I shall blog some of the recipes I’ve used over the school holidays!